
In previous guide, I shared how to initialize your local project directory in Git. Now, it is time to push it to GitHub. Here’s how to do that:
What You’ll Need
- A GitHub account (if you don’t have one, go to github.com and sign up - it’s free)
- Your project folder on your computer
- Git installed on your computer
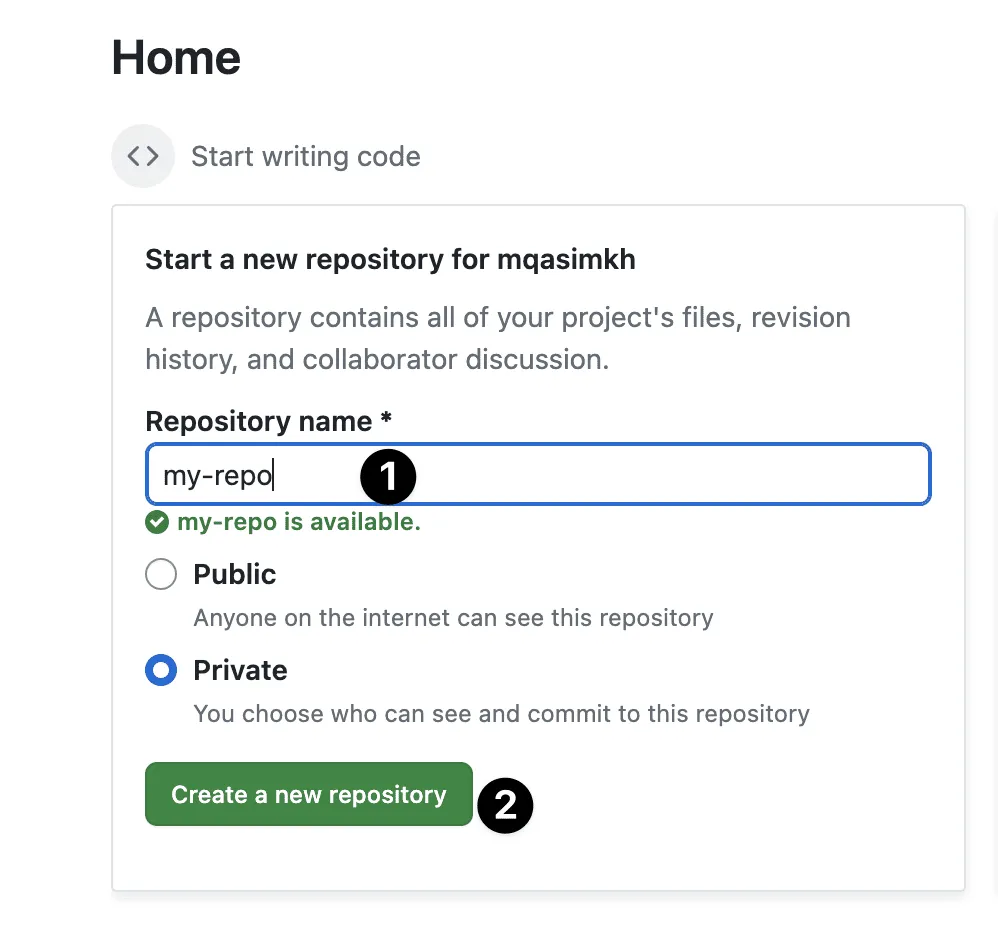
1. Create a New Repository on GitHub
- Open your web browser and go to github.com.
- Log in to your account
- Look for a + sign in the top-right corner and click “New repository”
- Give your repository a name.
- Click Create repository
2. Connect Your Local Repo to GitHub
After creating your repository, you’ll see a page with some instructions. We’re interested in the part that looks like this:
https://github.com/your-username/your-repository-name.git
This is the address of your new GitHub repository. We’ll use it in the next step.

3. Link Your Local Project to GitHub
- Open VSCode.
- Open the terminal in VSCode (you can usually find this under “View” > “Terminal”)
- Make sure you’re in your project folder (you can use the cd command to navigate)
- Type the following command, replacing the URL with your repository address:
git remote add origin [your-repo-remote=address]
Replace [your-repo-remote=address] with your GutHub repo remote address.
Press Enter to run the command
This tells your computer where to send your project files on GitHub.
4. Send Your Files to GitHub
Now, let’s upload your files to GitHub:
In the same terminal, type:
git push -u origin main
Press Enter to run the command
If asked, enter your GitHub username and password.
This command sends (or “pushes”) your files to the “main” branch of your GitHub repository.
Congratulations! Your project is now on GitHub.